Pages

Tuesday, May 29, 2012

Chocolate Blooms

I was so excited to find the buds for these beautiful blooms on my hoya a few weeks ago.  I have always admired the delicate flowers of my mom's plants.  Small beaded stars that are so unique!  And that fresh hint of chocolate......how can you not fall in love with them?


My mom had given me cuttings from her rope-like hoya several years ago.  Unfortunately, it didn't survive the winters in our tiny brick rental when the furnace would breakdown and we had no heat for several days.  Then a friend gave me one of her plants that was huge and being attacked by her cats.  I repotted the plant and it struggled for a few years.  I am thankful that our new house has served as a good home for this plant.  It is now doing extremely well in the window above my kitchen sink.  It is actually taking over the space and I need to add something to the window frame to allow it to climb! 

Thursday, May 24, 2012

Cleaning Out the Freezer: Recipe #2

I am not sure if this really counts.  Only one item came out of the freezer but even so, it is one thing that is out and put to good use! 

A friend from work gave me this recipe last spring and has allowed me to share it here.  It is for a rhubarb custard pie but she said it could be used with any type of fruit.  I had some strawberries left after jam that had a few soft spots.  I thought of this recipe, sliced them up, and gave it a try! 

Fruit Custard Pie

3 eggs
1 1/2 cups sugar
2 Tbsp flour
2 Tbsp melted butter
1/2 tsp salt

Combine all ingredients and with 1 qt fruit.  Bake in pie shell until brown and almost set.

Now you are probably wondering what I pulled from the freezer...pie crust!  Not your typical, buttery, flaky pie crust.  No, I found a log of sugar cookie dough that was leftover from a large batch of cookies some time ago.  I thawed out the dough, rolled it, and used it as my pie crust. 

This pie was very sweet and the cookie crust gets a bit too crunchy from extended baking but it was a very nice touch to this sweet concoction.  The syrupy goodness of the pie filling was balanced by the crunch of the crust.  A pie crust shield or some aluminum foil around the edges will definitely help the crust from getting too dark.  I didn't get a picture of the pie before it was devoured with some ice cream.  My husband freely shared that this was a pretty good recipe.  If I get a unprompted compliment about food from him, it means he really enjoyed it!

Monday, May 21, 2012

The Best Spring Combination

I love the combination of strawberries and rhubarb!  Definitely one of my favorites this time of year.

This is the second growing season for my three rhubarb plants.  I harvested a few stalks this season and I am hoping that next year will be an abundant harvest.  I picked up several bunches at the farmers' market and froze some of it.  The rest has been used in treats!  Here are the rhubarb plants as they started poking through this year.

We purchased some strawberry plants this year from the store which were basically roots in some sawdust.  I was so excited to plant them in my hanging planter early this year!  My excitment was quickly squashed by the lack of green leaves.  Out of 10 plants, one has survived.  I purchased more at the farmers' market in town and they are growing wonderfully.  We have eaten about three strawberries and the rest of have been gobbled up by the birds, chipmunks, and maybe even my garden-loving dog!  Oh well!  Back to buying produce from a more experienced farmer.


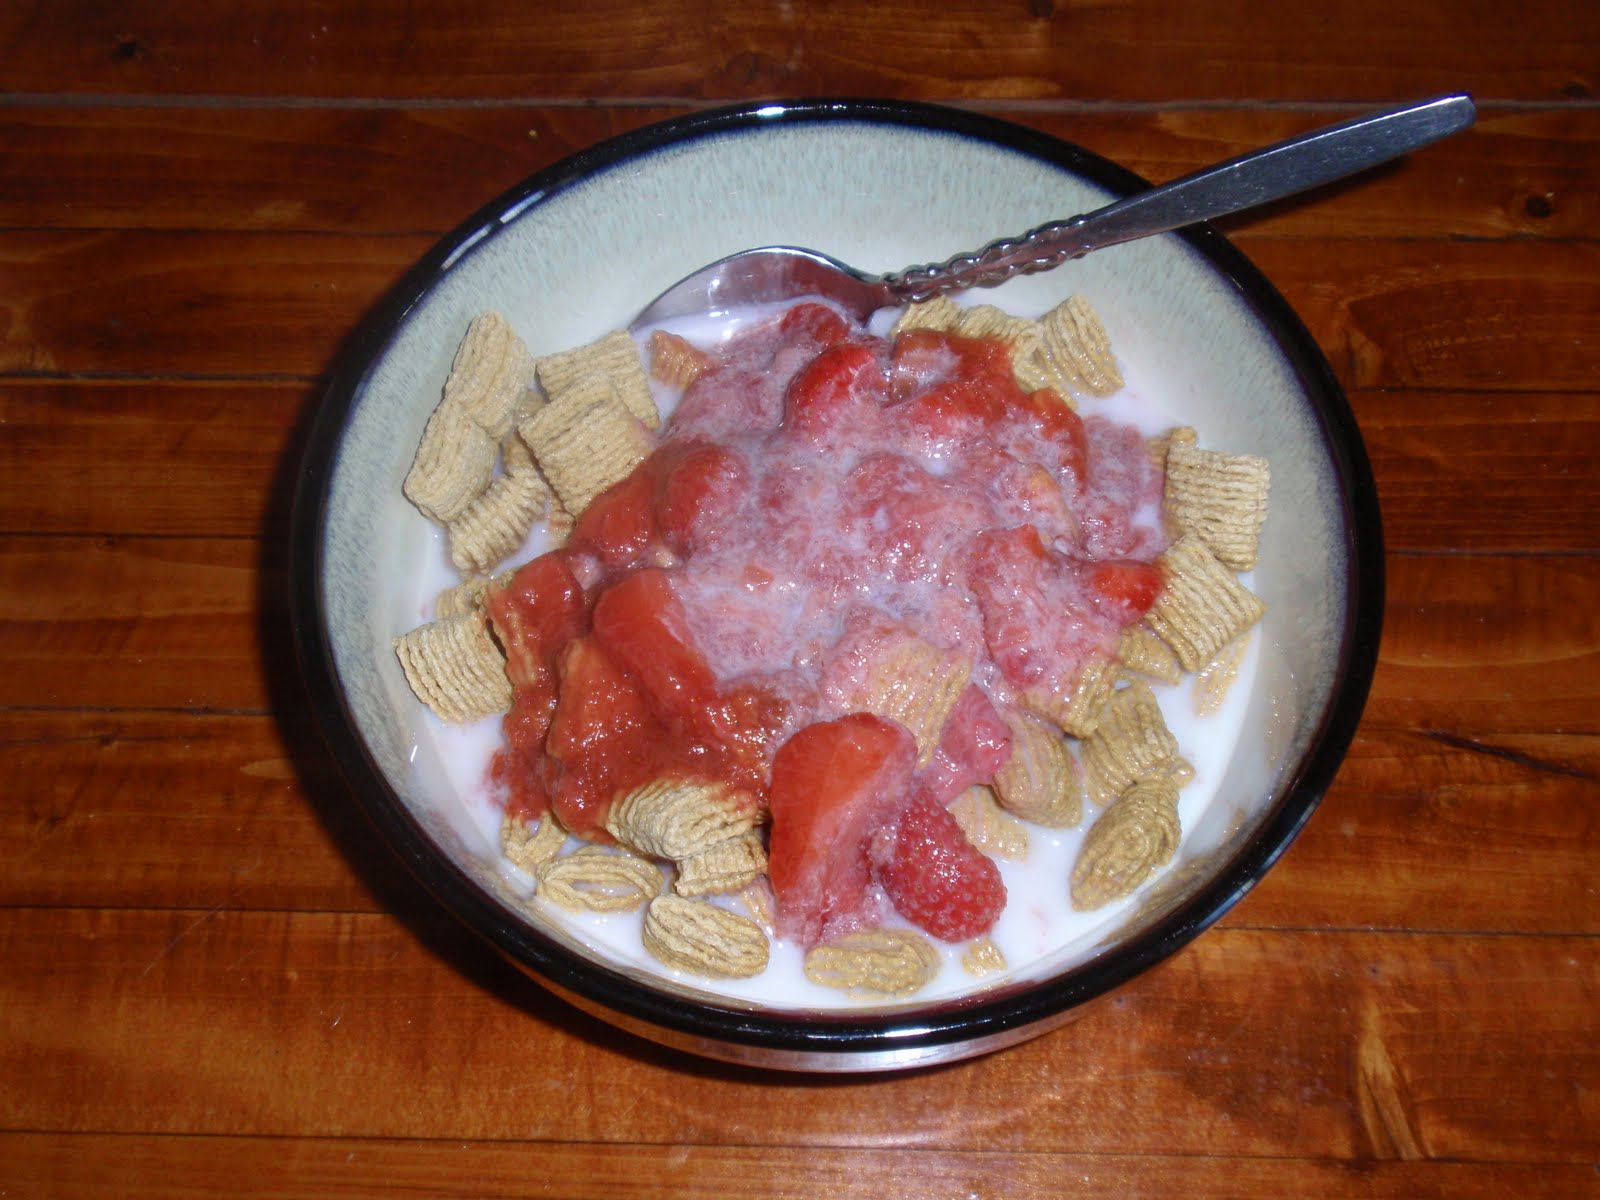
This is one of my favorite memories of childhood breakfasts.  My mom would cook up strawberries and rhubarb to make an excellent topping for cereal.  Quaker Oat Squares complement the flavors well.  I found some cereal at the discount grocery store a few months ago for $1.28 a box!  Such a great deal! 


Last week I put up some strawberry rhubarb jam and this morning enjoyed a smoothie with a few of our own stalks.  My husband actually enjoyed the jam despite his dislike of the veggie!

Tuesday, May 15, 2012

Cleaning Out the Freezer: Recipe #1

I am on a mission to clean out our freezer (and cupboards) as we get more and more fresh produce locally.  My husband has been telling me I should prepare for preserving the garden and I was inspired by some other bloggers who are trying to cut their grocery costs by cooking from the food they have stored up. 

I have already gone through some of our freezer stock.  I found some shredded zucchini the other day that I knew would make a great treat.  I didn't want the same old zucchini bread so I dug through my recipe box.  I found a recipe for "Zucchini-Oatmeal-Chocolate Chip Bars" that was ripped from a magazine.  Two things you should know about me concerning this recipe:  I have never been a huge fan of chocolate and zucchini together and I don't like to follow recipes.  In my kitchen, recipes are for inspiration and ideas, not the definitive how-to. 

So here is my adaptation that morphed into Zucchini-Oatmeal Cinnamon Bars:


Beat until smooth:
1 cup packed brown sugar
2 eggs
2 Tbsp oil
3 Tbsp flax meal

Add:
3/4 cup whole wheat flour
1/2 tsp baking soda
1 tsp vanilla
2 tsp cinnamon

Stir in:
1 cup oatmeal
1 cup shredded zucchini
cinnamon chips (or chocolate chips if you prefer)
3/4 cup finely chopped walnuts

Spread mixture in a greased 13x9 pan and bake at 350 degrees until lightly browned. 

I am guestimating some of the measurements as I just dumped some of the ingredients in the bowl.  I had about 3/4 of a bag of cinnamon chips.  I absolutely adore these and they are a nice substitution for chocolate chips in many recipes.  The bars made a nice treat, warm from the oven, when my in-laws stopped over.  They were also a nice breakfast bar the next morning for me and the dogs ;)  Not overly sweet and adjusted to be somewhat healthy!


Saturday, May 12, 2012

Reptiland

Finally!  After vowing to visit Reptiland for years, we finally made it last weekend.  I had lots of fun and enjoyed all of the exhibits.  I am not so sure that the trip was exciting for our nephew, just turned 16, but it was a great afternoon with family.


Wednesday, May 9, 2012

Summer To-Do List

I have been thinking about something to share because it has been awhile since I posted.  I had several ideas but I thought my summer to-do list would be perfect since I can taste the end of the semester(s)!  I also hope that sharing my list will help keep me accountable because people will be interested in the results.  Then it occurred to me that I haven't really written much about what I do for a living or why this time of year is exciting....

I have worked as a clinical laboratory scientist/medical technologist for eight years.  Yes, I work in a hospital.  No, I am not a nurse.  No, I am not a phlebotomist but I do depend on the blood-drawing experts.  Have you ever had your blood drawn?  Peed in a cup?  Had your throat swabbed?  Most people have and really don't know what happens after.  That is where I come in!  I get all of that stuff that comes out of your body and do various types of testing to give the doctor tons of information about your condition.  I have worked as a med tech in three different facilities but the best thing about it is it led me to teaching, which is my true passion.  I began teaching at the hospital where I completed my MT internship.  I fell in love with sharing my thirst for knowledge!  I earned a masters in adult education and haven't looked back. 

I now teach for two different colleges and work part time at a hospital.  Most of the courses I teach are online.  I still love being in the traditional classroom and try to pick up one on-campus course a semester.  I love the freedom of working from home and having flexibility in my schedule.  It gives me time with my husband and family.  This summer I am excited to be working at the hospital and not teaching courses!  I have only a small amount of clinical rotation scheduling to do for the one school which I am not really counting as work.  This makes me very excited because I have a long list of projects to fill up my spare time.  Here it is!

  • refinish the picnic table---already got this one done even before my courses are done!
  • learn to crochet---started but it is not going as quickly as I wanted :(
  • finish ladder plant stand---photos and more about that later
  • stain bathroom wall shelf
  • paint bathroom shelf---already started and yes there are two shelves
  • paint bedroom shelf and jewelry box to match dresser---I will have to post pics of my dresser which is one of my fave refinishing projects!
  • bedroom lamp---bought a lamp for $5.50 at the thrift store.....still trying to decide how I want to spruce it up
  • rearrange pantry---already done....moved a bunch of stuff that I don't use frequently to storage in the basement and now it has stayed organized for several weeks!
  • rearrange laundry room including create a hamper/sorting station
  • move craft room---all of my craft supplies and work area are moving from the second floor of the house to the basement, about 1/2 of it is moved
  • clean carpets
  • paint stairway---all holes are patched, just need to sand and paint
  • paint living room
  • reseal kitchen counters
  • find a dresser for the kitchen---I will explain this when I find the perfect piece :)

I am very excited about many of these projects.  The finished products will help to make our house our home!  My goal is to work on a few projects every week and then post pictures and commentary about my progress.  I am just afraid that I will keep adding to the list instead of getting things crossed off!

Sunday, April 29, 2012

Homemade Yogurt

Microorganisms are a huge part of my life.  I am a clinical laboratory technologist and love the study of microbes and parasites.  Most people say yuck when I get excited!  This has lead to a fascination with cultured foods.  So much of what we eat is dependent on the action of microrganisms. 

A few years ago I experimented with homemade kefir.  Kefir is similar to yogurt in that it is a fermented milk product.  It is much runnier and contains different bacteria.  The freeze-dried cultures I used for making kefir were not ideal but I did not have a good source for kefir grains and was not super impressed by the taste either.  Kefir is great for drinking and making smoothies but I love yogurt with granola and fresh fruit for breakfast or a snack.  Kefir just does not lend itself to this type of dish.  Plus I was using a stove-top which was somewhat labor intensive.  I decided it was not worth the effort to keep pursuing this prep method.

More recently, I began reading again about homemade kefirs and yogurts.  I found several sources for making crockpot yogurt or other incubation methods.
 
http://www.keeperofthehome.org/2011/04/making-homemade-yogurt-2.html
http://www.thefamilyhomestead.com/yogurt.htm
http://bornambitous-bornimaginative.blogspot.com/2011/03/yogurt.html

This sounded like a great idea!  So I tried it.....with not so great results.  I sterilized the milk in the crockpot and let it cool.  I used Stonyfield yogurt and kefir cultures as starters.  I added powdered milk and even pudding mix to one batch.  Each time I got slightly thickened milk.  Yuck.....well it did make some great strawberry smoothies and banana/Nutella smoothies but I still wanted thick yogurt. 

Then I said to myself, you are a scientist!  You can figure this out!  So I read more recipes and thought about the process and concepts behind it.  As long as the crockpot was turned off, that milk was going to cool down.  Over several hours it will reach room temp.  Bacteria does not grow well at room temp, well Yersinia does but we are not detecting stool pathogens here (at least I hope not!).  My hypothesis was that the temperature of the crockpot after cooling was not sufficient for adequate growth of the cultures.  So I filled my crockpot with water.  I heated it up.  I unplugged it and monitored the decrease in temperature.  Sure enough that crockpot was not staying warm very long!  I will save you all of the data points but I knew what I had to do!

Bacteria grow best at body temperature.  I wanted to maintain a temp of 95-105 degrees.  My oven cannot be set that low so that option was crossed off.  My crockpot has a low and high setting.  I needed a warm setting or a precise thermostat but I wasn't going to go out and buy a new crockpot.  So today I did another experiment and had success!

I added about half a gallon of milk to my crockpot and heated on high for about 2.5-3 hours.  After the heating process, I turned the crockpot off and let the milk cool to about 110 degrees.  I added powdered milk and about a half cup of Stonyfield.  I checked the temperature of the mixture every so often.  I was not really precise with the time intervals, just checked when I had a break in the other projects I was working on this afternoon.  When the temperature was dropping below 100 degrees, I turned the crockpot on low.  I let it heat for about 10-15 minutes and turned it off again.  I did this twice in about 5 hours and by then the yogurt was a great consistency!  Not as thick as some varieties but enough that I could eat it instead of drink it. 

I am so happy that I found a solution.  One more thing that we can do ourselves at home!